
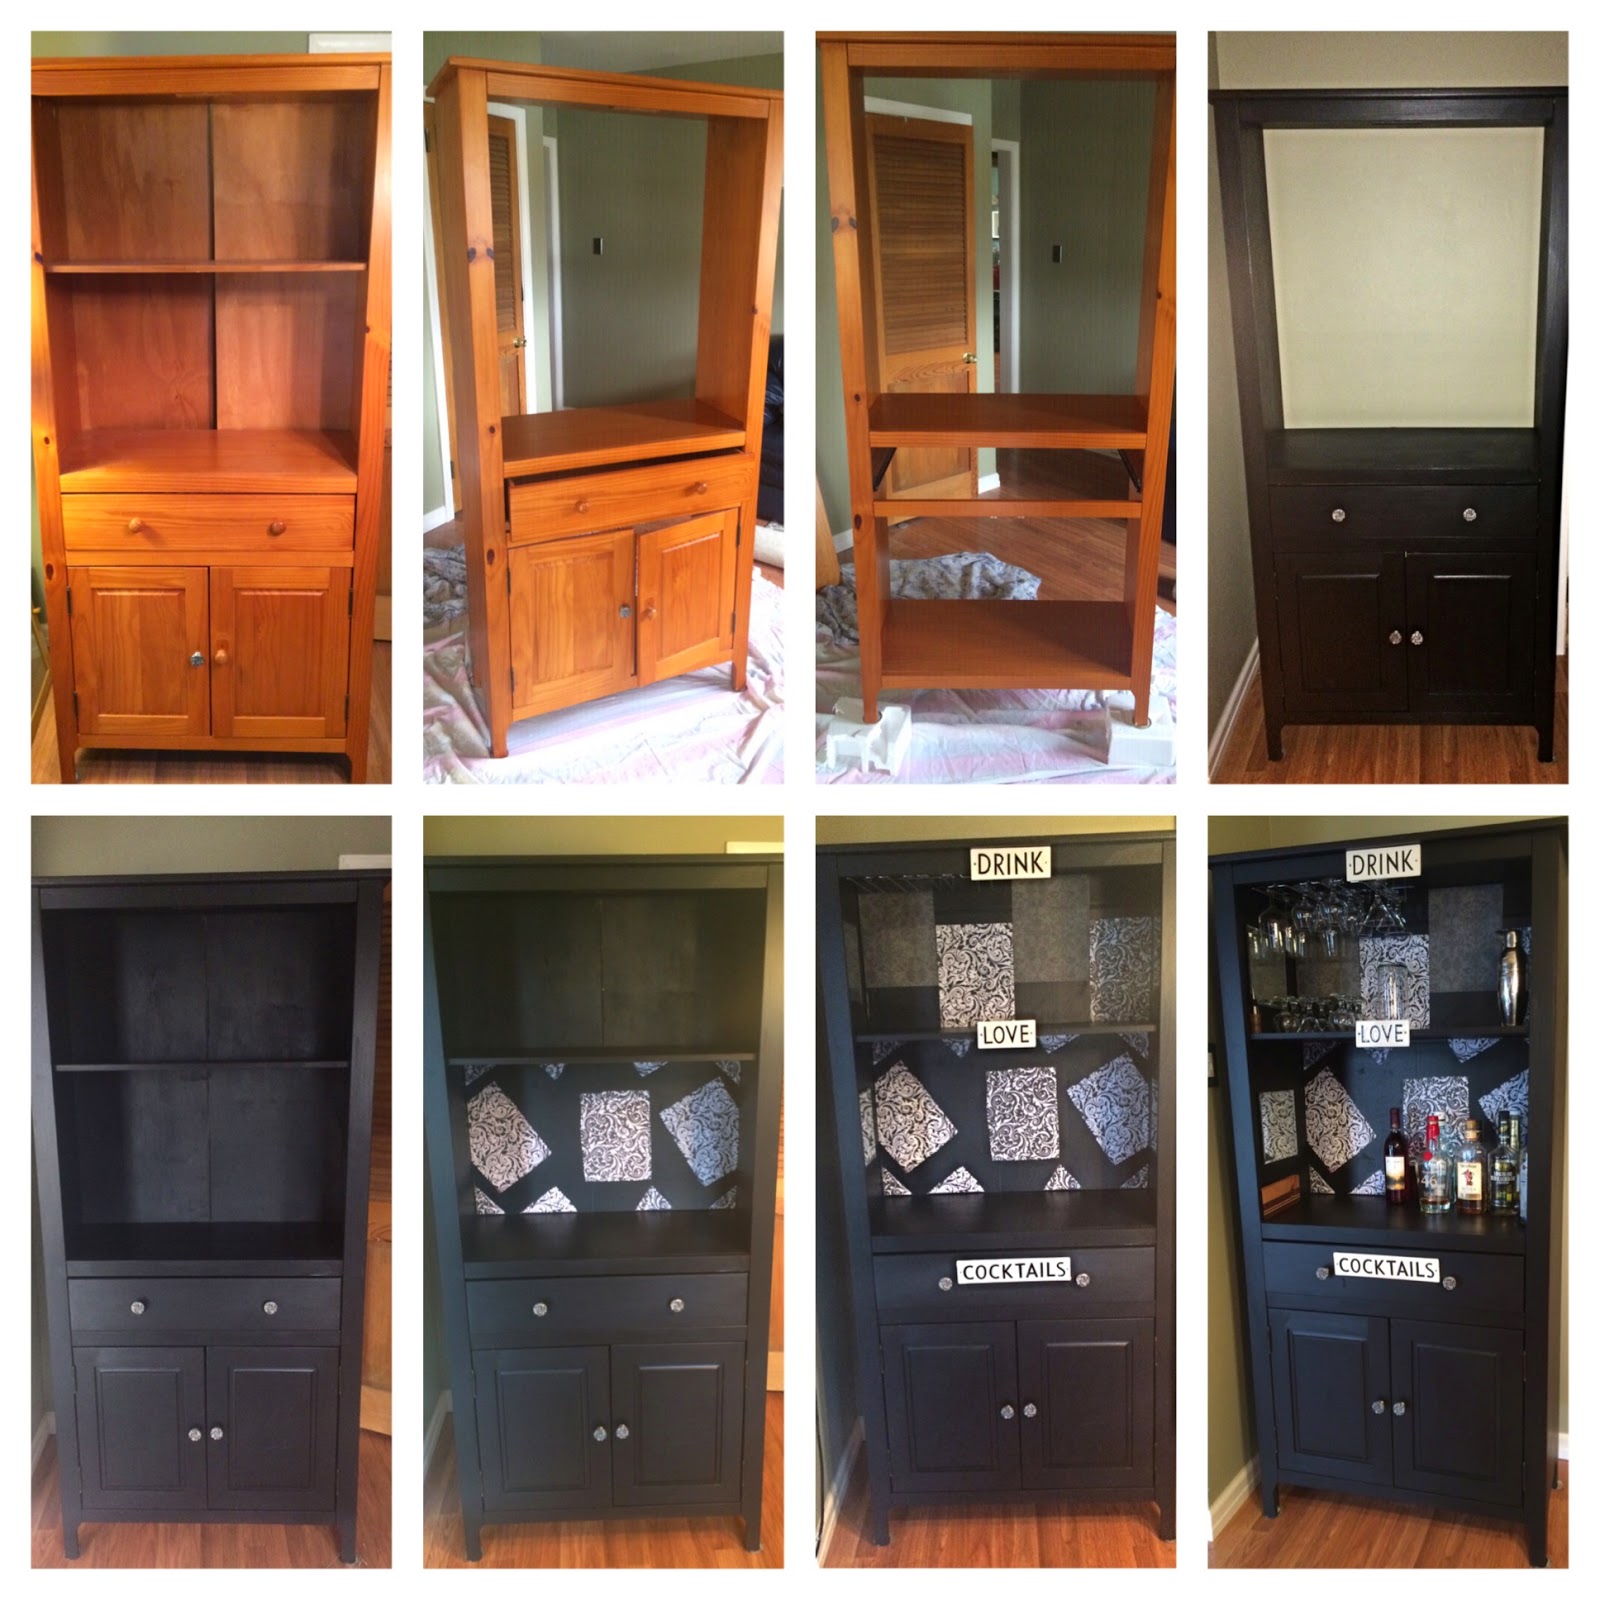
The original piece of furniture had doors on the top row. For some unknown reason I didn't take a "before" picture ... I think I was just excited to get started!

Painting the Furniture
I used the techniques of painting furniture from the Vintage Store House. I really liked Kelsey's explanations- She is really nice and encouraging! I pretty much followed everything she said.
Here is the link:
http://www.vintagestorehouse.com/diy-furniture/how-i-paint-furniture/tutorial-how-to-eliminate-brush-strokes-on-furniture/
I used everything she uses in her tutorial Sherwin Williams Paint, Vintage Store House Chalk Powered, Sherwin Williams Brush, Fiddes and Son's wax...
I'm not sure the wax finish did much... I don't really see a difference but I did it anyway. Maybe over time it will be come evident why you need to do that step.
Back Board
The back of the cabinet was my most perplexing challenge. The two boards in the back were held together with a piece of plastic leaving about a 1/4 gap. I tried to shimmy a piece of wood in between but it wasn't flat. So I decided to cut up some black poster board I had and make two panels to fit into each level. I used scrapbooking paper to decorate the boards. I'm holding them in place by double sided tape so If I want to change the look of the bar I can... I'm sure I won't, but the option is there....
Finishes
I bought the Signs Drink, Love, Cocktails from a great store in Philly. I walk by it when I'm roaming the city but can't think of the name or find it on-line as I write this. If I find it, I'll update the post... These are my signs of old age coming through, or paint fumes... Not sure which one...
I bought stemware holders and new hardware from Lowes. The glassware holders are screwed into the top shelf, which is solid wood. There are four mirrors- one on each side and row, which I purchased at walmart. You can't really see them in the pictures but it does make a difference when you see it in person.
Now, I have a grown up place to make my cocktails... Come on over and have a drink!

Cost
So... it wasn't as "cheap" as I thought it would be to repaint furniture. I guess now that I have the supplies the next piece I do will be even more economical. I'm excited for flea market season to start.... I'm sure there were things I could have done to make this even less expensive, but for my first try- I'm o.k. with it!
Paint $17
Wax $20
Paint Brush- $18
Ceramic Signs $43 (My big splurge- I just feel in love with them...)
Stemware Holders $7
Scrapbook Paper $7
Mirrors $12
Hardware $28
Total $152
1 comment:
LOVE it! Thanks for sharing with me over at Vintage Storehouse & Co. I just can't get enough of furniture transformations like these!
Post a Comment